
NDS FISH FINDER APP Quick Guide
For quick guide to bait boat, please click here
For quick guide to NDS Integrated sonar bait boat, please click here
NDS mount Sonar Quick Guide, please click here
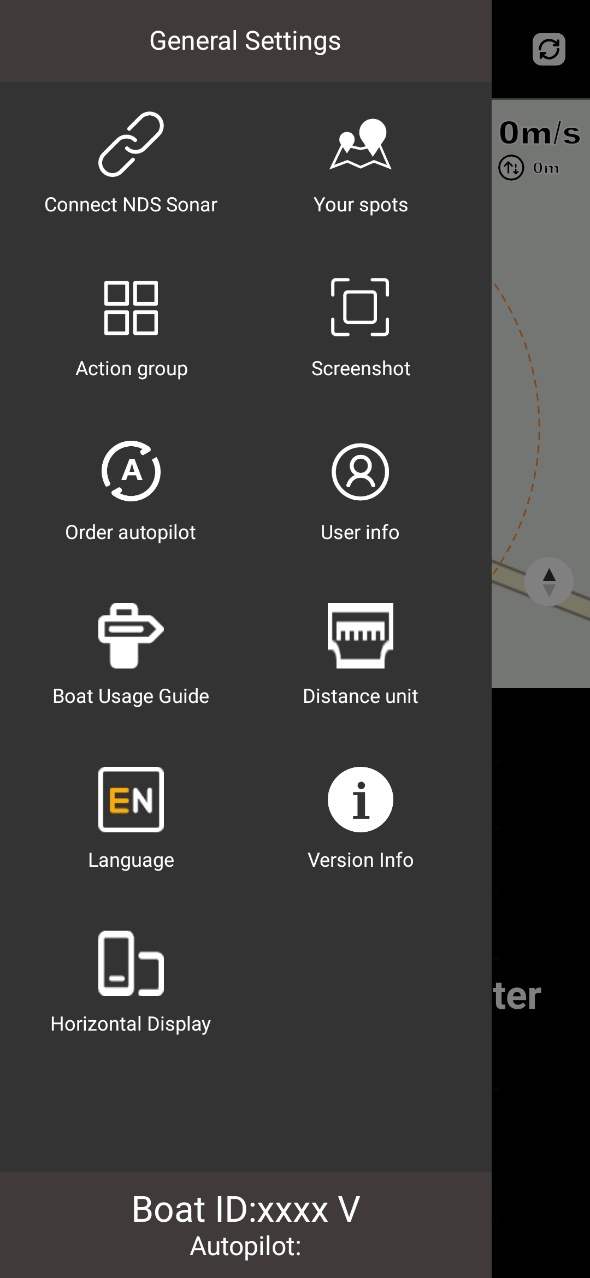
APP system menu
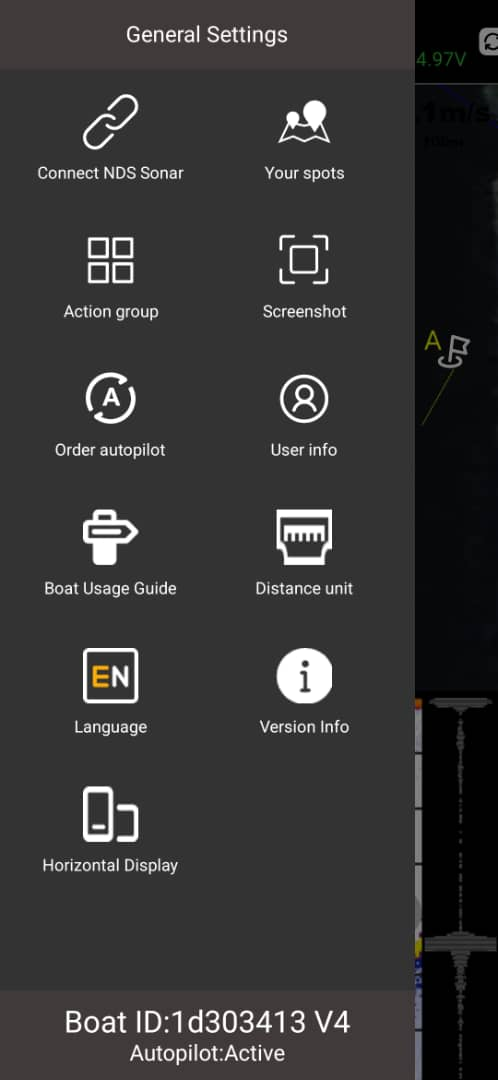
 Connect Sonar guide
 NDS Spots Cloud Interface
 Edit Action Group Interface
 Share Current Screen with Friends
 Subscribe to Autopilot feature (requires data network)
 Logged-in User Information
 Boat Connection Guide Interface
 Switch Units (m / yard / feet / 12ft rods)
 Language
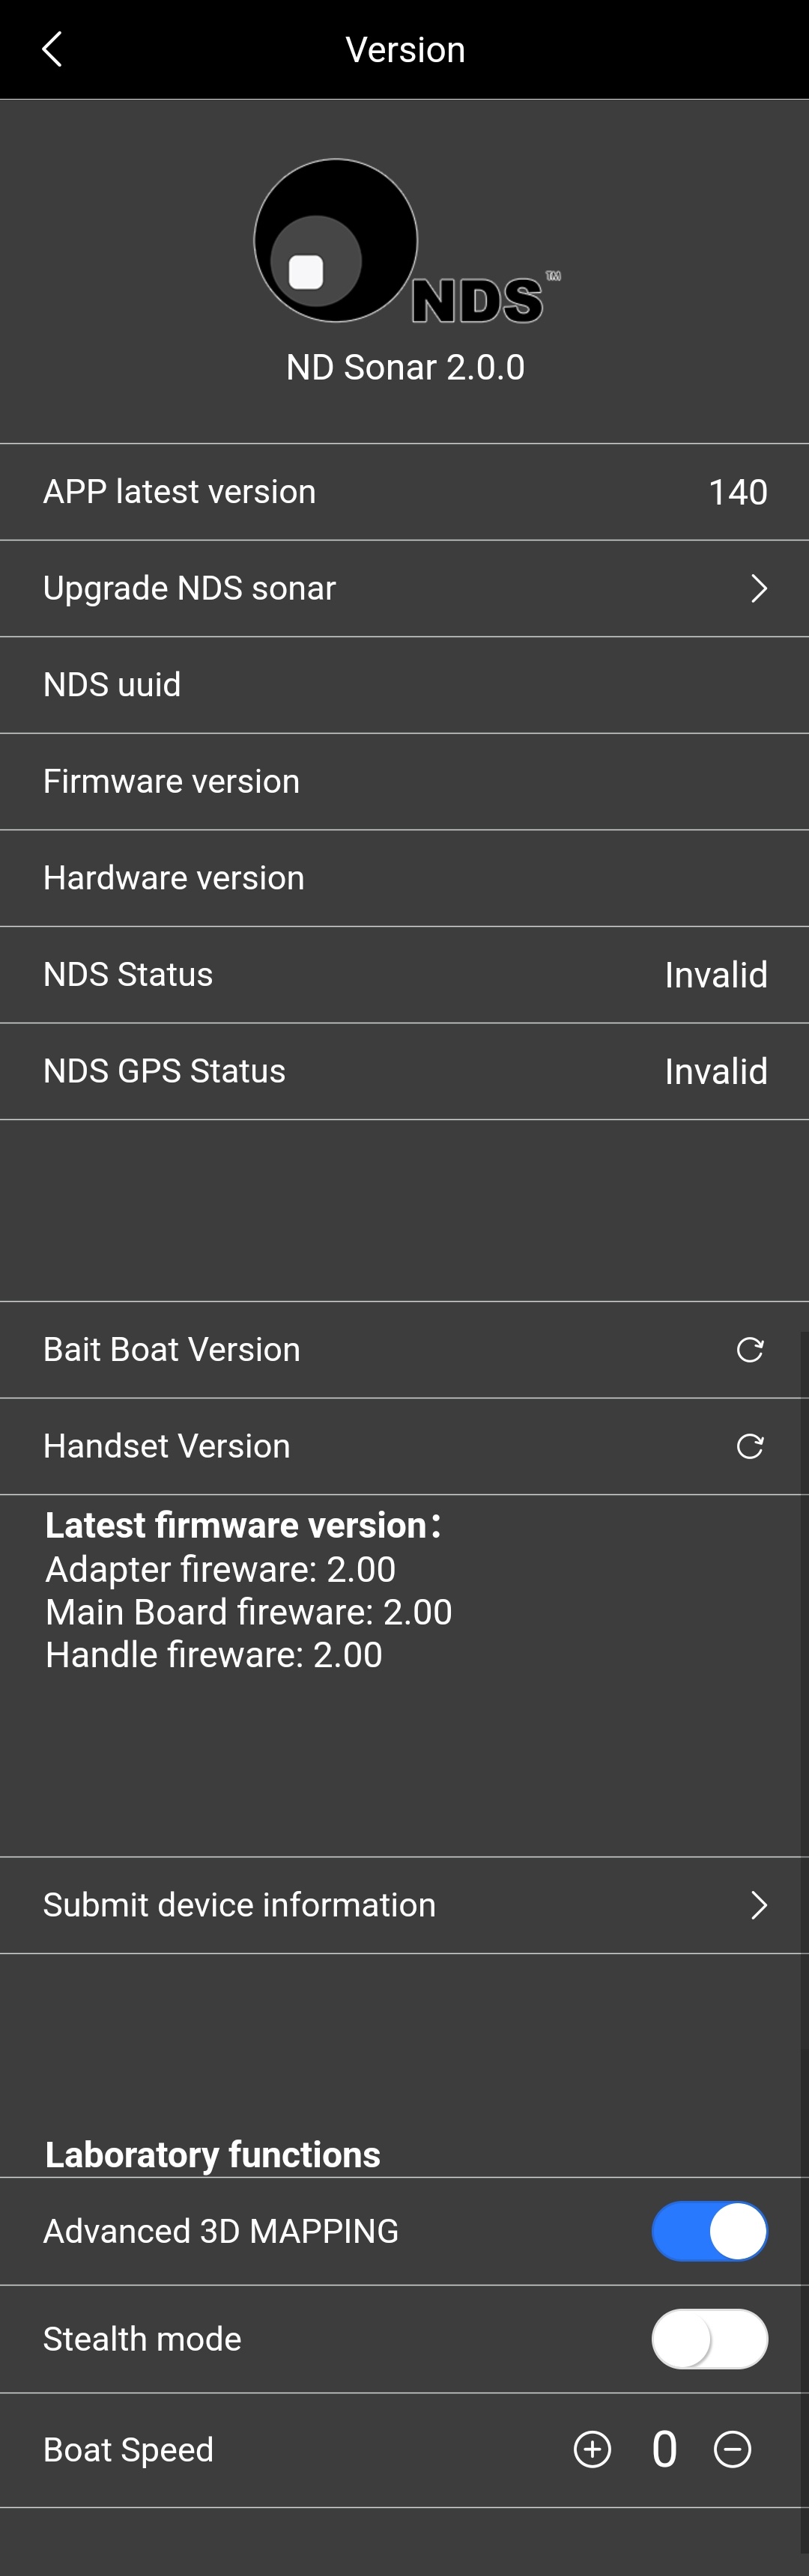
 View Boat/Sonar Version Details, Update Firmware, Enable Test Features
 Switch Between Landscape and Portrait Orientation
APP main interface
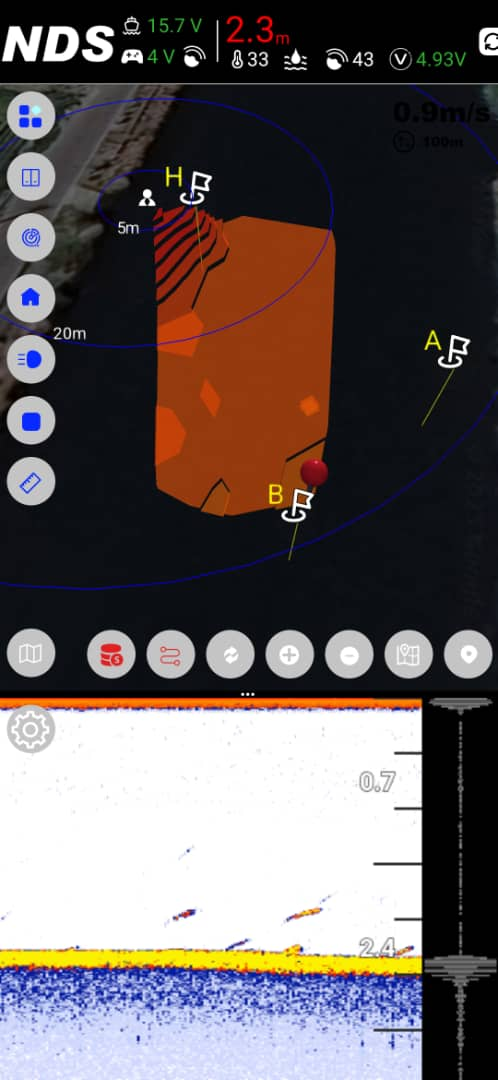
 Functional Icons Fold
 Bait Compartment Interface
 Spots Interface
 Back to Home (bait boat)
 Turn Lights On/Off
 Stop(bait boat)
 Turn on/off Measuring Ruler
 Map Setup Interface
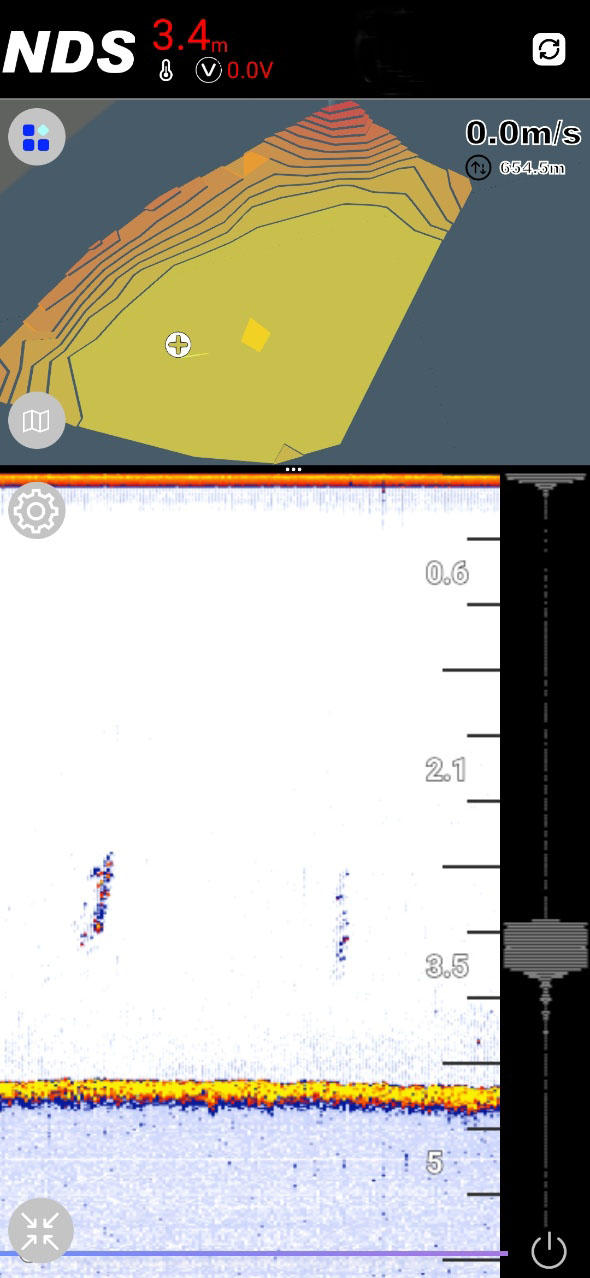
 Bathymetric DATA Interface
 Mapping
 Area Definition tool
 Calculate Path
 Send
Send
 Clear Path
 Refresh Map Spots
 Zoom In
 Zoom Out
 Locate to Bathymetric map
 Locate to Live Mark (Phone)
Map settings
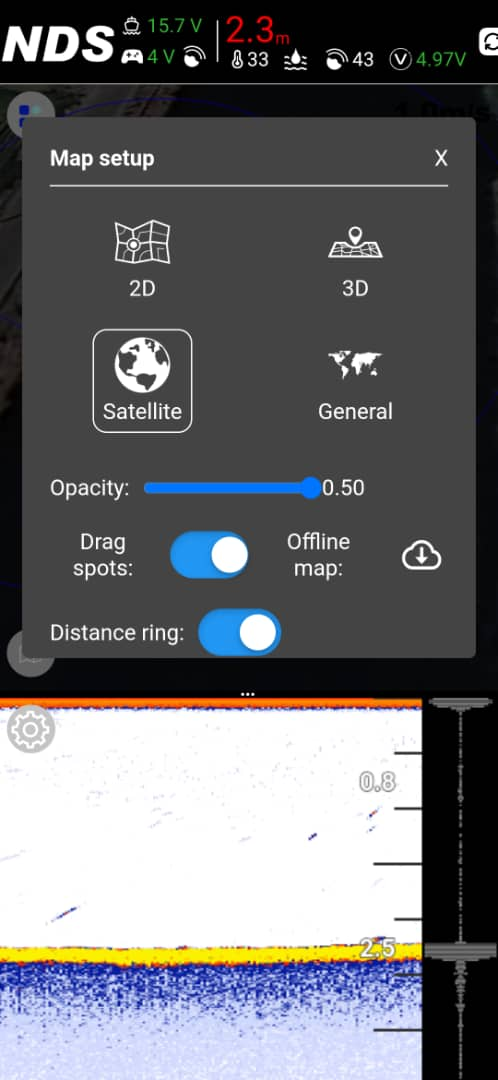
 Satellite Map
 Offline Standard Map
Drag spots: Draggable Spot Icons on/off
Offline map: Offline Map Download Window
Distance ring: Toggle Distance Rings On/Off
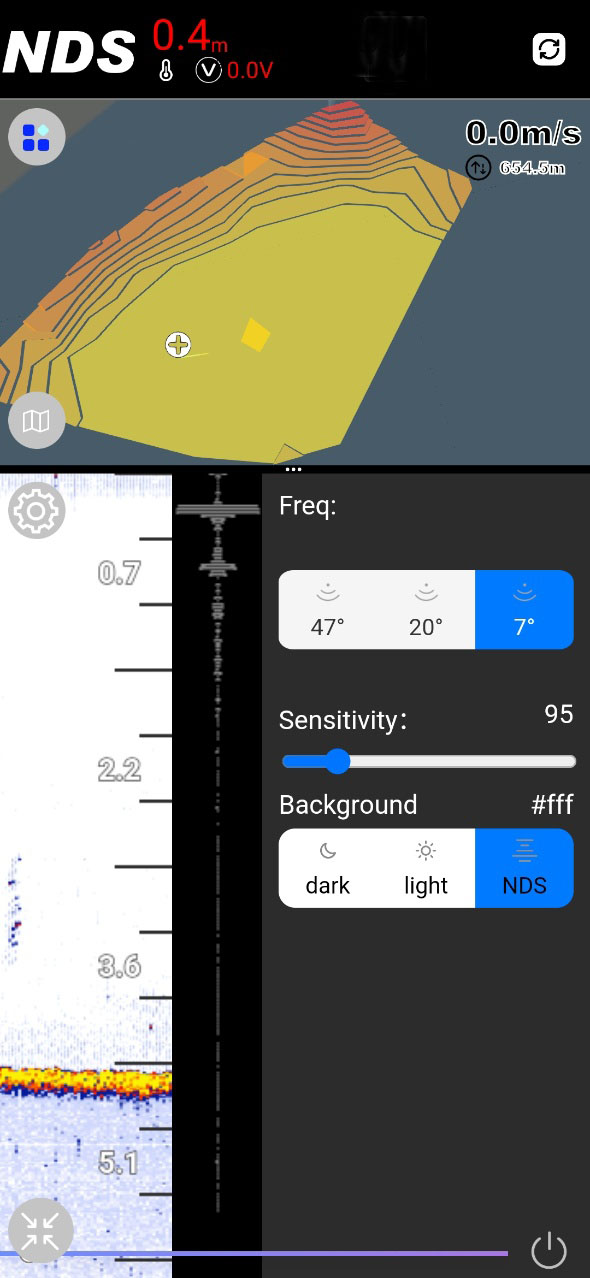
Sonar Settings Interface
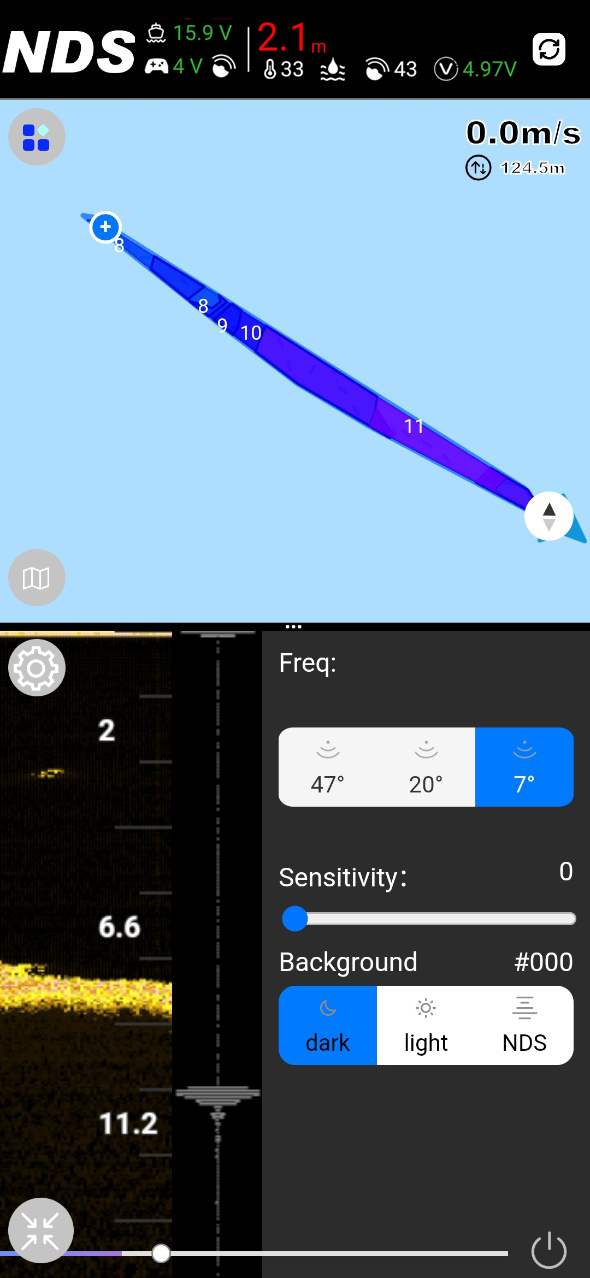
Freq:
7 degrees - 680k High-frequency beam with a range of 0.3-30 meters (30 meters verified) and 1 cm resolution allows for ultra-sharp and highly detailed fish arches and crisp bottom contours, making it easy to identify individual fish even in shallow waters.
20 degrees - 200k Mid-Frequency Beam (range of 0.5-100 meters, 30 meters verified), resolution of 2.4 cm ). The perfect combination: clear structural imaging with extended depth penetration. Ideal for scanning steep slopes, tracking baitfish schools, or fishing at transition depths.
47 degrees - 100k The Low-Frequency Beam has a range of 0.8 to 30 meters (30 meters verified) and a resolution of 2.4 cm. The Wide Mode provides maximum coverage for finding baitfish clouds and large game fish. Its advantage in deep water is that it maintains clarity when targeting fish at greater depths.
Understanding Sensitivity:
· Lower Sensitivity Values: Preserve more detail (less filtering).
· Higher Sensitivity Values: Apply more filtering, resulting in a cleaner display.
Setting Your Sensitivity:
You can adjust the sensitivity level based on your personal preference and experience.
Our Recommended Approach:
· Start Low: Begin with a relatively low sensitivity setting.
· Increase Gradually: Slowly raise the value.
· Find the Sweet Spot: Stop when the display is readable (low clutter) but still shows good detail in the sonar returns.
As your experience grows, mastering this feature will significantly enhance your ability to locate fish and identify underwater structures.
Background:
NDS APP supports three modes: Dark is suitable for use at night, Light is ideal for use in bright light, and NDS Mode creates a unique display style that is distinctive to our brand.
APP Version Information
How to set sonar frequency and sensitivity?
1. Click the "Settings" icon in the upper left corner of the sonar display, and the sonar settings interface will automatically pop up.
2. Click the settings icon and a menu for setting frequency and sensitivity will appear at the bottom of the screen.
Freq:
7 degrees - 680k High-frequency beam with a range of 0.3-30 meters (30 meters verified) and 1 cm resolution allows for ultra-sharp and highly detailed fish arches and crisp bottom contours, making it easy to identify individual fish even in shallow waters.
20 degrees - 200k Mid-Frequency Beam (range of 0.5-100 meters, 30 meters verified), resolution of 2.4 cm ). The perfect combination: clear structural imaging with extended depth penetration. Ideal for scanning steep slopes, tracking baitfish schools, or fishing at transition depths.
47 degrees - 100k The Low-Frequency Beam has a range of 0.8 to 30 meters (30 meters verified) and a resolution of 2.4 cm. The Wide Mode provides maximum coverage for finding baitfish clouds and large game fish. Its advantage in deep water is that it maintains clarity when targeting fish at greater depths.
Understanding Sensitivity:
· Lower Sensitivity Values: Preserve more detail (less filtering).
· Higher Sensitivity Values: Apply more filtering, resulting in a cleaner display.
Setting Your Sensitivity:
You can adjust the sensitivity level based on your personal preference and experience.
Our Recommended Approach:
· Start Low: Begin with a relatively low sensitivity setting.
· Increase Gradually: Slowly raise the value.
· Find the Sweet Spot: Stop when the display is readable (low clutter) but still shows good detail in the sonar returns.
As your experience grows, mastering this feature will significantly enhance your ability to locate fish and identify underwater structures.
Background:
NDS APP supports three modes: Dark is suitable for use at night, Light is ideal for use in bright light, and NDS Mode creates a unique display style that is distinctive to our brand.
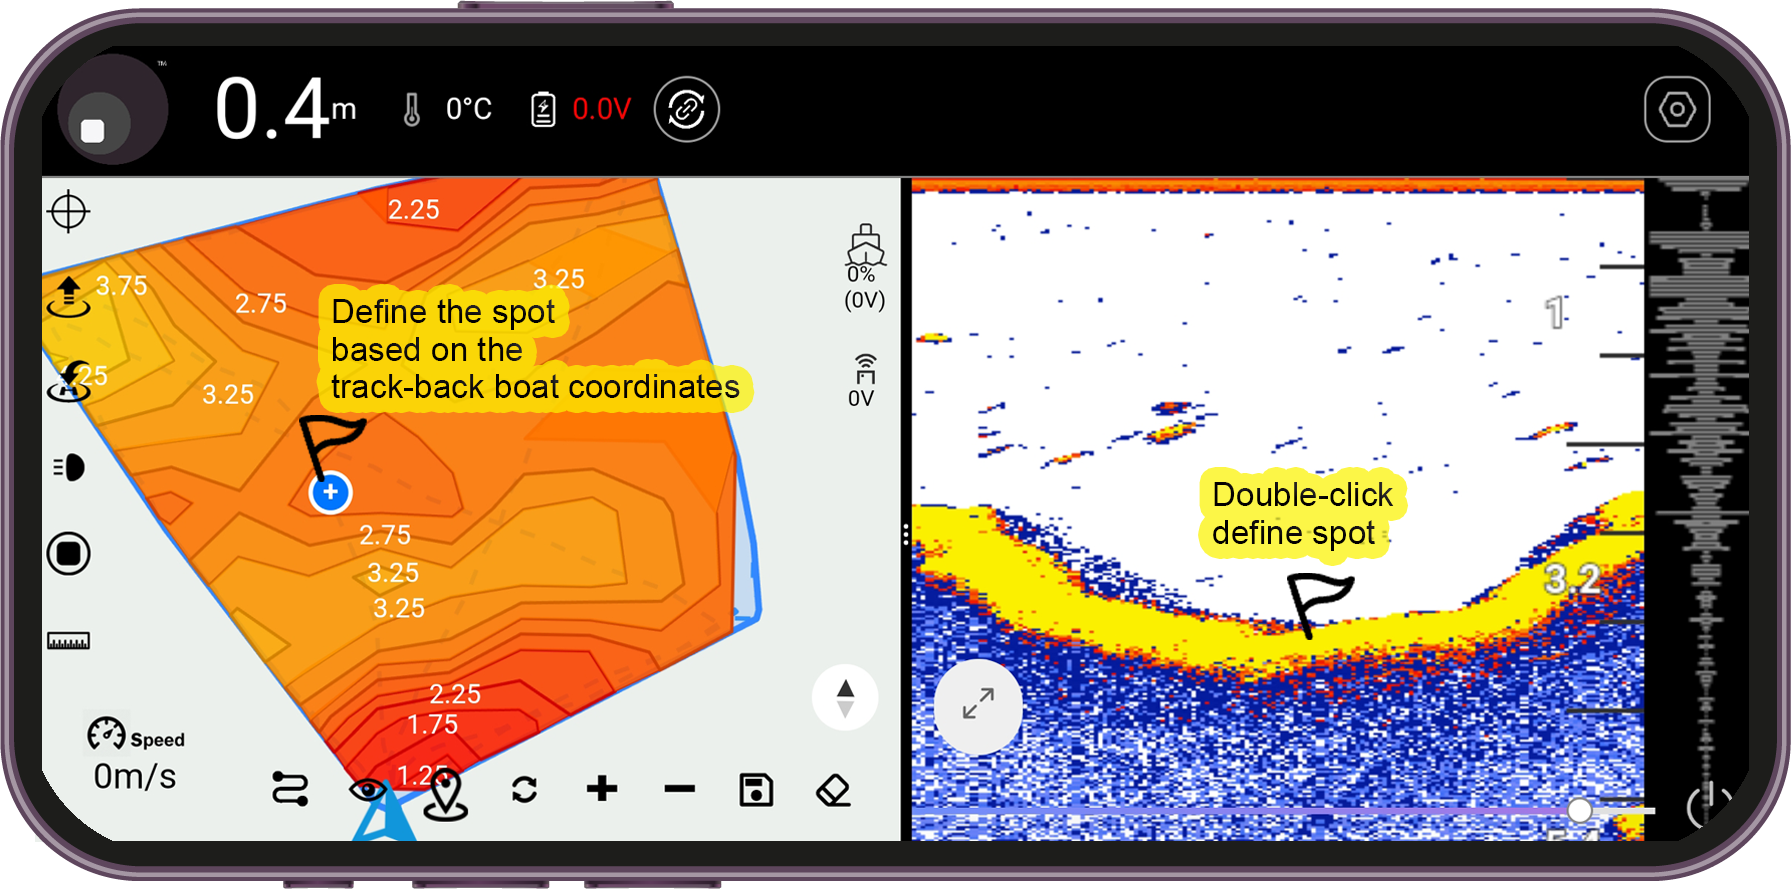
How to rewind & define spots ?
Swipe left to right on the sonar display to view historical sonar data.
Double-click (sonar) or click + (map) to define spots.
How to record and replay?
1. Click to enter the interface of Bathymetric DATA
2. Click ‘Record’ at the bottom left, and ‘Start recording’ will appear on the screen.
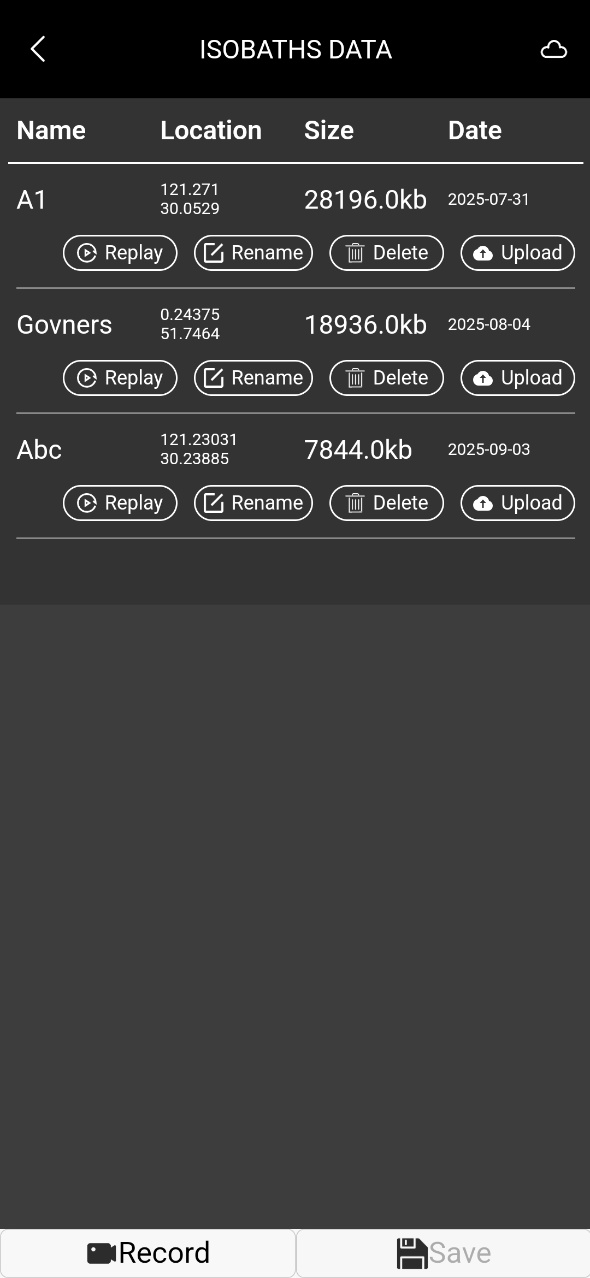
3. After the recording is completed, click to enter the interface of Bathymetric DATA.
4. A record will appear on the screen.
Click 'Save' at the bottom right, then enter a name for the record.
4. Once saved successfully, you can click ‘REPLAY’ to view this record.
5. During viewing you can pause or play by clicking the button in the middle of the screen.
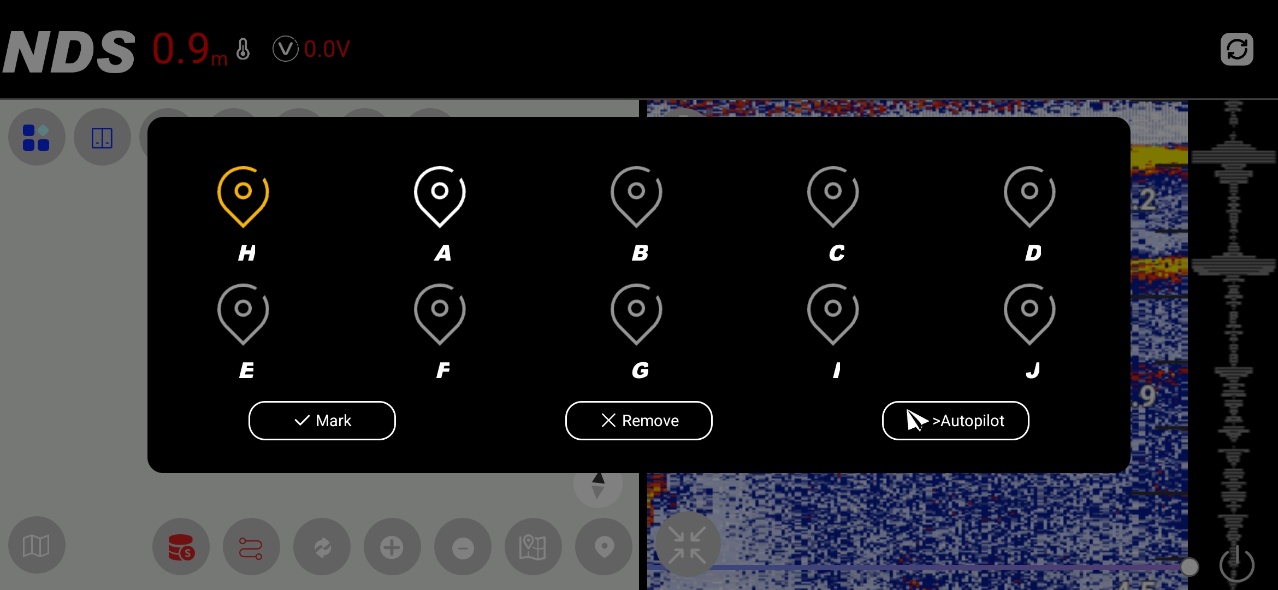
How to Set a Spot Using the Map:
1. Long-press on a desired area of the map.
2. Spot selection interface will pop up.
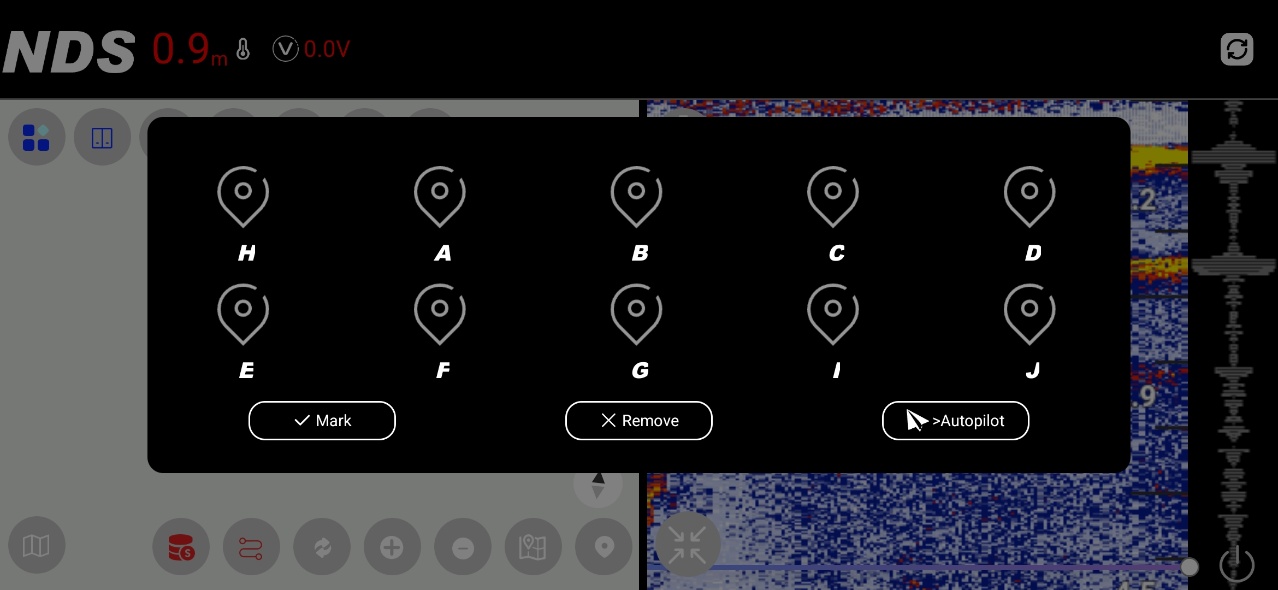
3. Select a spot. Tap "Mark".
4. Done.
This process allows quick and accurate spot marking for navigation and automation.
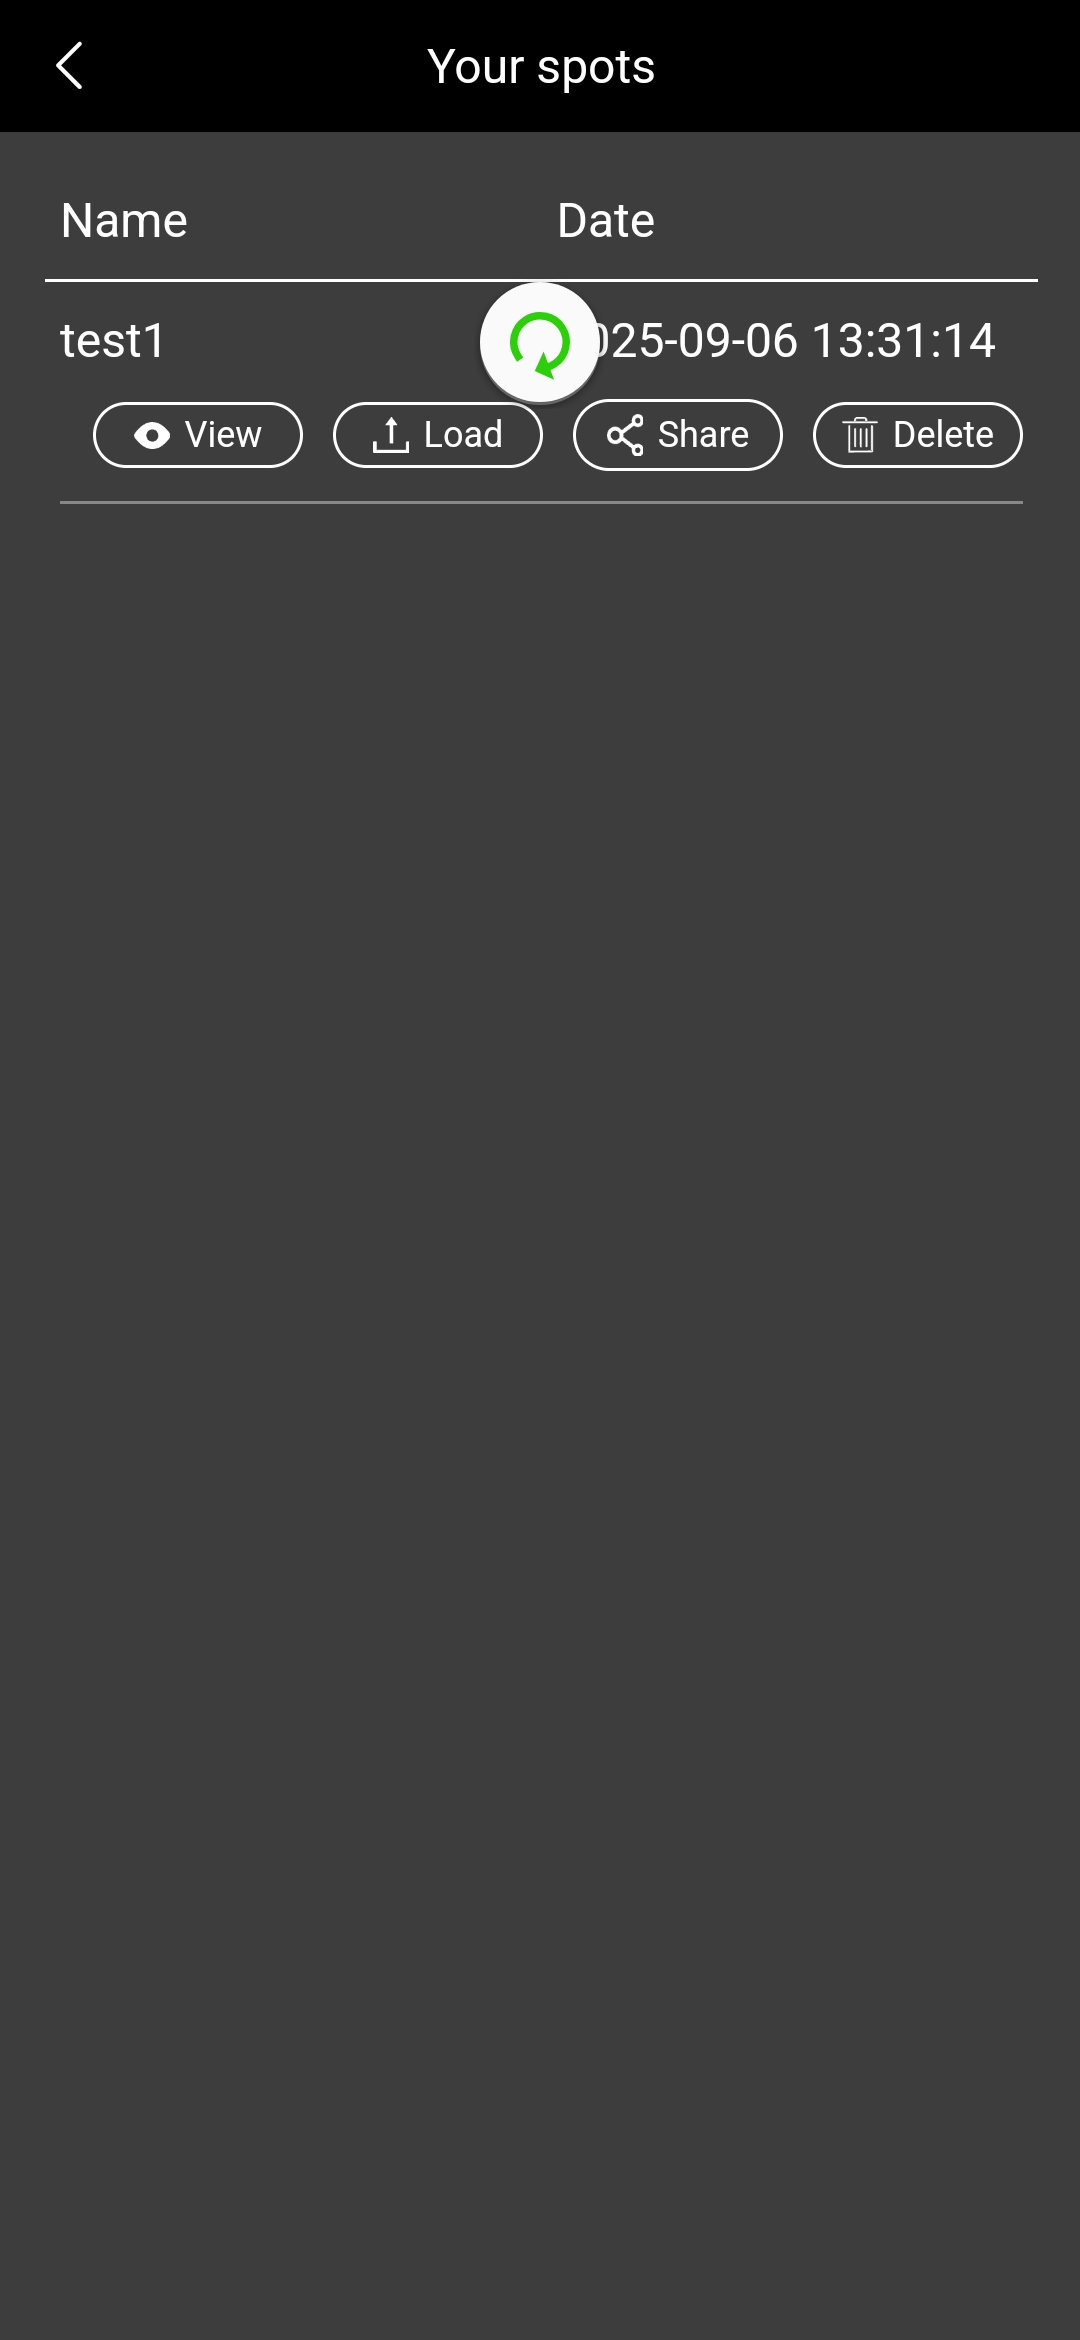
If you want to upload All Spots to NDS Cloud, To upload all spots from the Spots interface to NDS Cloud, follow these steps:
1. Tap the System Menu.
2. Select Your Spots.
3. Click the Save button.
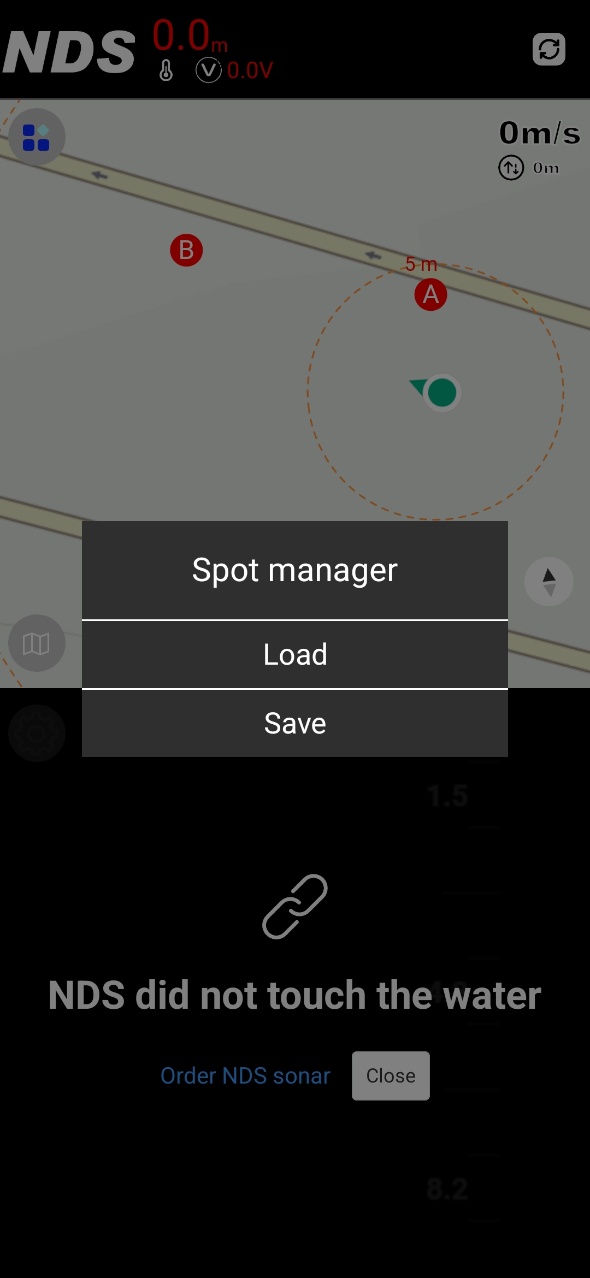
4. Enter a name for the spots group.
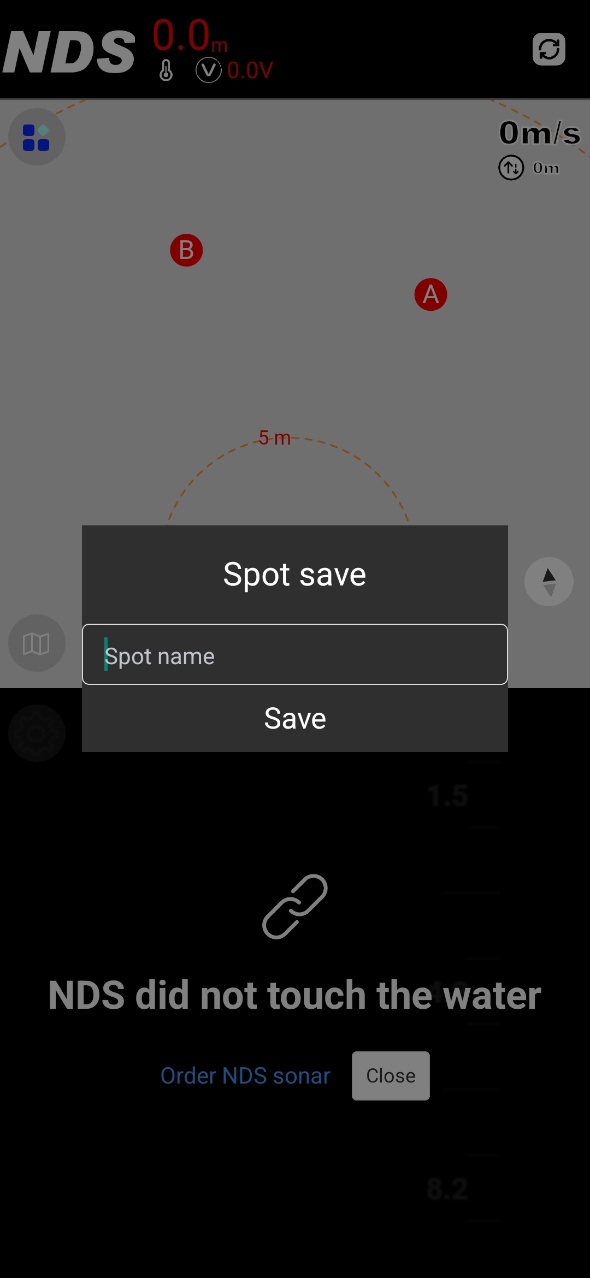
5. Confirm by clicking Save.
6. To verify if the save was successful, re-enter the Your Spots interface and tap Load.
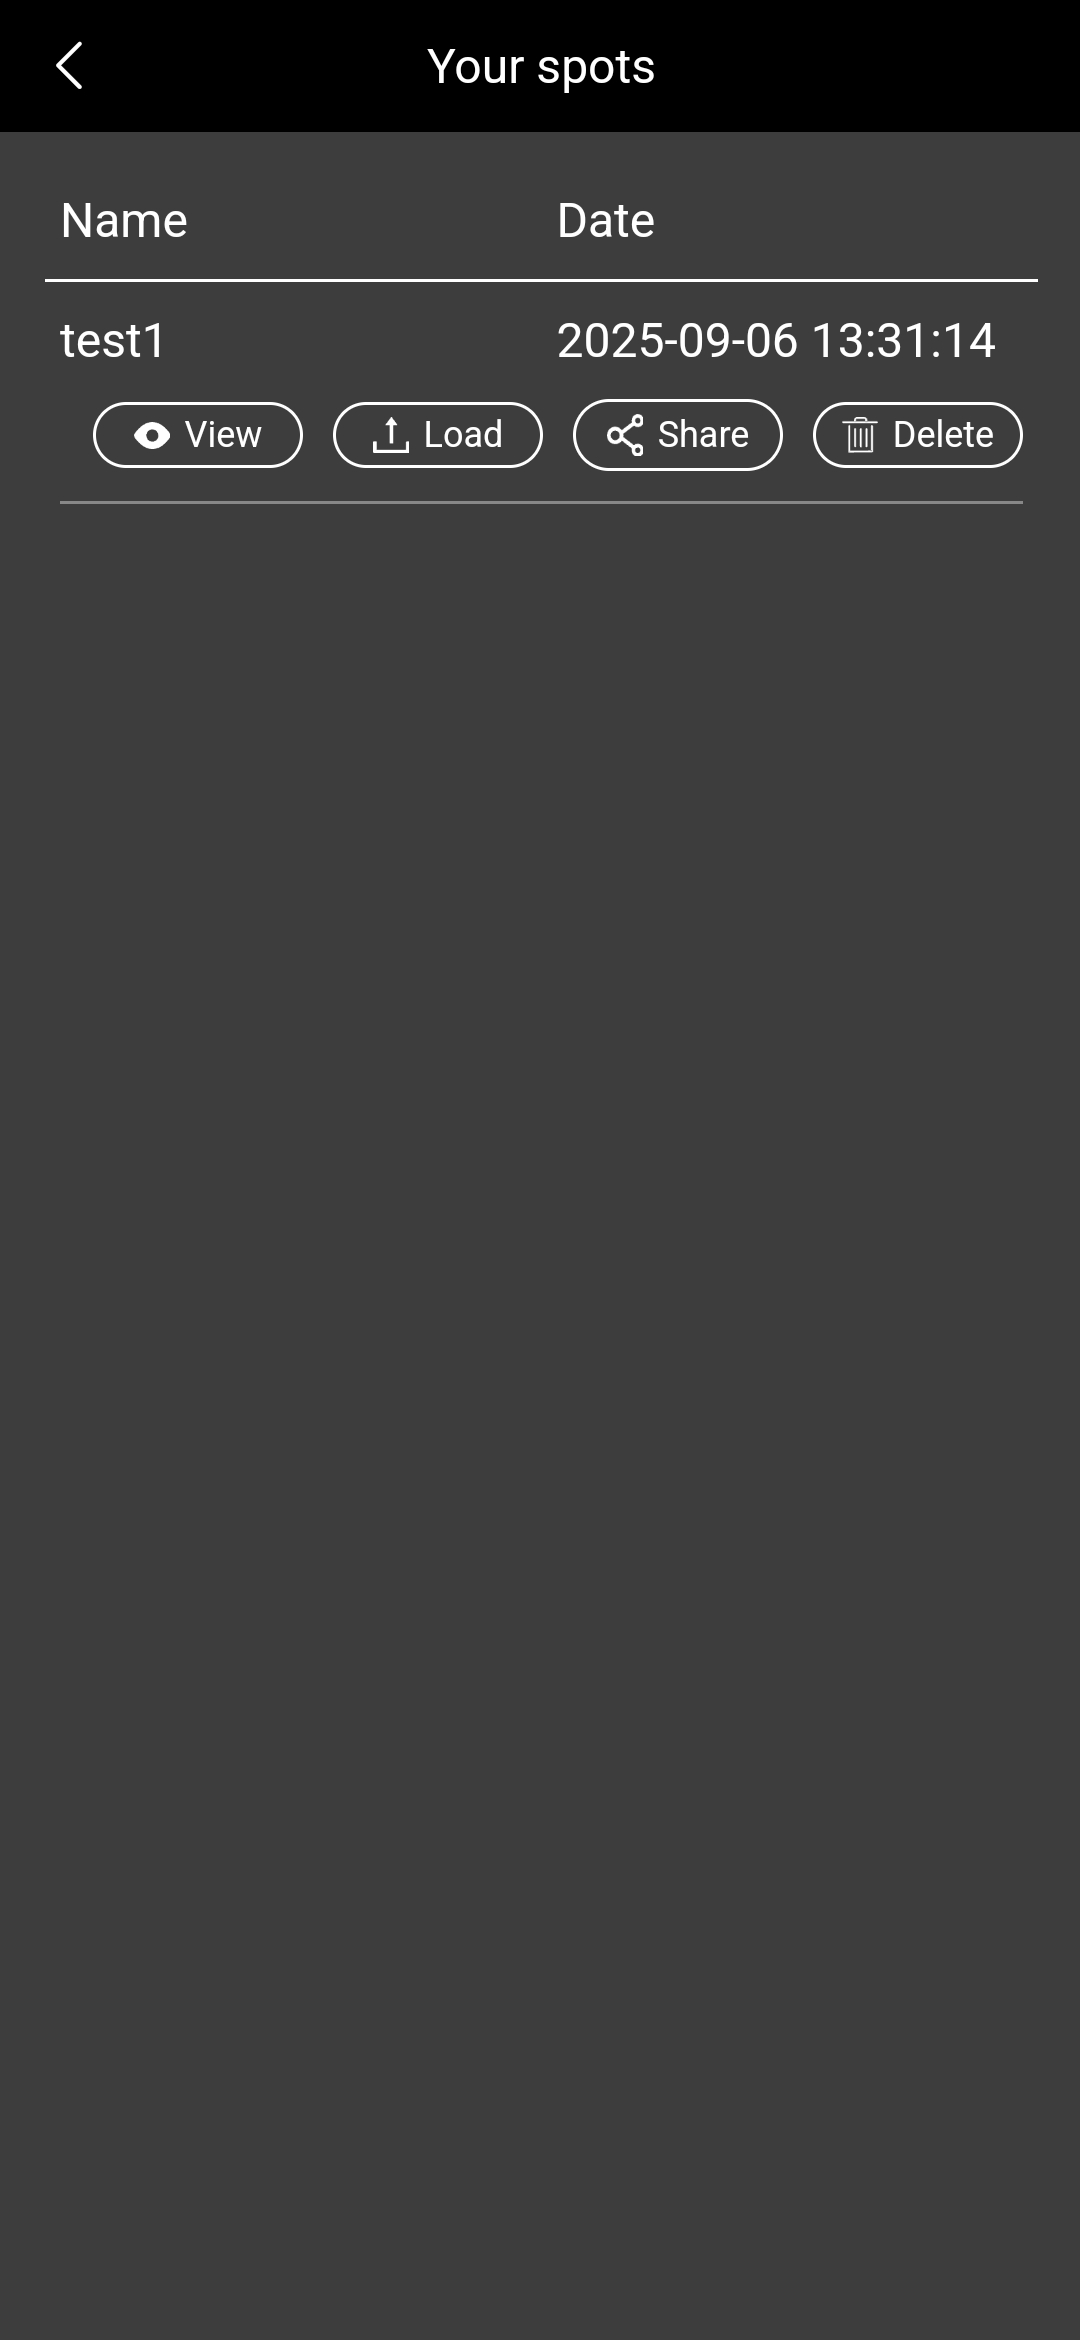
Note:
To upload spots to NDS Cloud, ensure your mobile data is enabled. While in the Your Spots interface, simply pull down the screen to synchronize all spots to the cloud.
How to Use Autopilot via the App:
1. Tap the Spots icon to open the spots interface.
2. Select the desired spot for navigation.
3. Click the Autopilot button.
4. The boat will automatically proceed to the selected spot.
This provides a quick and effortless way to navigate to predefined locations.
How to live mapping your lake:
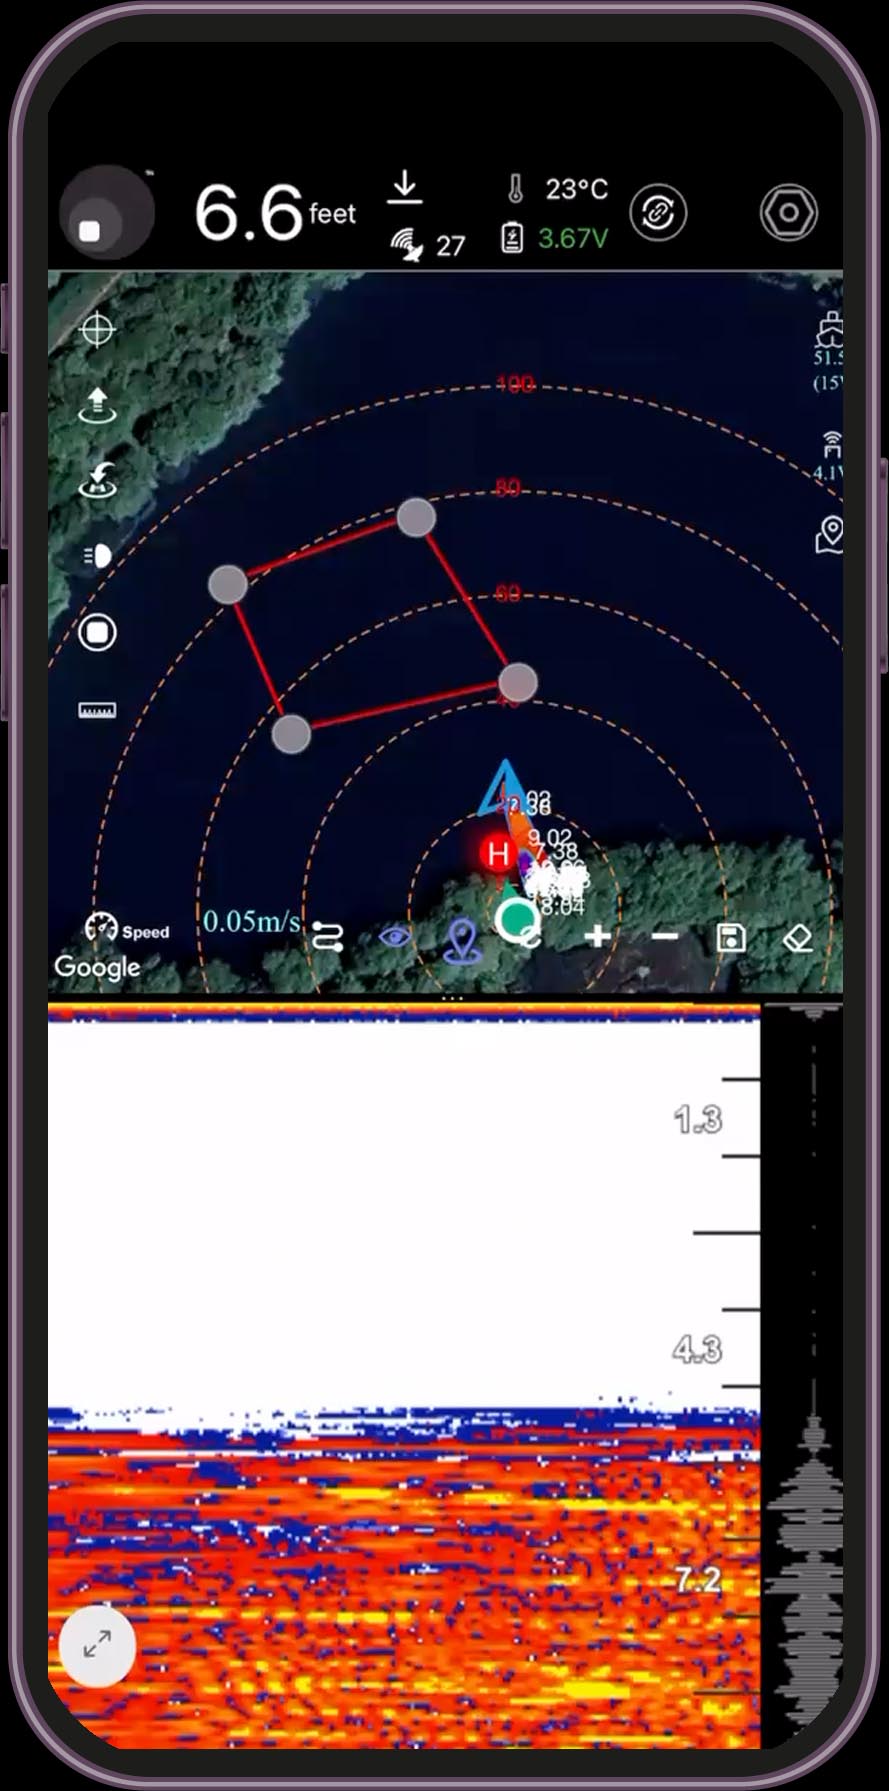
To create a detailed map of your lake, follow these steps:
1. Tap the Mapping icon .
2. Select the Area Definition tool — a rectangle will appear on the map. Adjust its four corners to define the scanning area.
3. Tap the Calculate Path icon to generate an optimized scanning route.
4. Tap the Send icon to transmit the path to your boat.
5. Once received, the boat will automatically follow the designated route to scan the area.
6. To clear the planned path without interrupting the ongoing mapping process, use the Delete icon.